
I like to make my own jam. Unless you buy the crazy-expensive kinds, store-bought jam tastes kind of blah — over-sweet, too much filler, not enough fruit. I think I was spoiled by home-made jam when I was growing up and as with so many things (air conditioning, dishwashers, high-speed Internet) there is no going back.
You can probably make jam with stuff you have in your kitchen right now, but it helps to have some equipment. None of the extra equipment is very expensive — everything I show here would run you about $30 or $40, which you’ll make back pretty quickly if you make jam instead of buying it. It really is cheaper (especially once you own a bunch of jars) and you can’t beat the quality.
Here are some general instructions for fruit jams, like strawberry or raspberry — most fruit jams are easy and not a botulism risk, but if you’re doing something low-acid like blueberries, please use a real, tested recipe.
First, you need some jars. You can buy a dozen 250ml Mason jars plus lids at most grocery stores, Canadian Tire, etc. This will run you about $8.
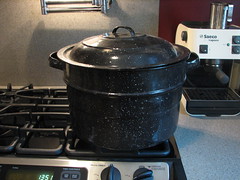
Second, you need a big pot in which to boil and thus sterilize your jars. If you have a big stock pot you can use that. Or you can buy one of these cheap purpose-built enamel jobs. Sears, Canadian Tire and a bunch of other places usually carry them in the spring and summer.
Now you need some way to keep the jars off the bottom of the pot so they don’t break while they’re boiled. You can buy a metal insert like this (if you bought the enamel jam-sterilizer pot, it probably came with it):
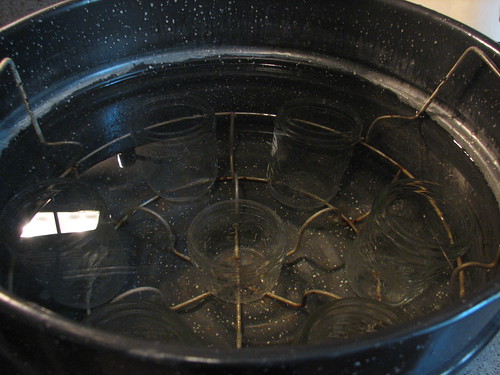
Or you can use a small metal rack, such as a roasting rack or even tie a bunch of the screw-tops for the jars together with string.
Here’s some other handy stuff:
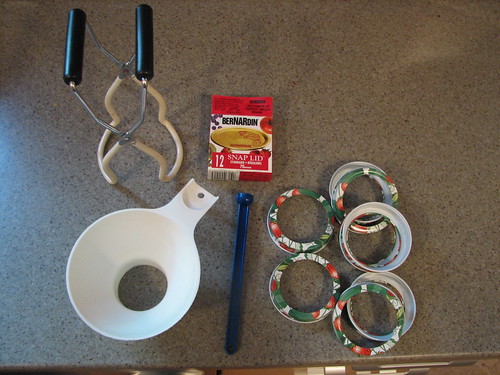
In that picture there’s a jar lifter (for picking jars out of the boiling water), a plastic funnel for pouring jam into jars, a box of snap lids, a magnetic wand for lifting heated snap lids, and screw tops for the jars. You probably have the snap lids and screw tops already if you bought a dozen jars. The other stuff is nice to have but not at all necessary.
OK, now we need some fruit and some sugar. That’s all the ingredients in real jam: fruit and sugar, in that order. It’s best if a quarter or a third of the fruit is a little under-ripe.
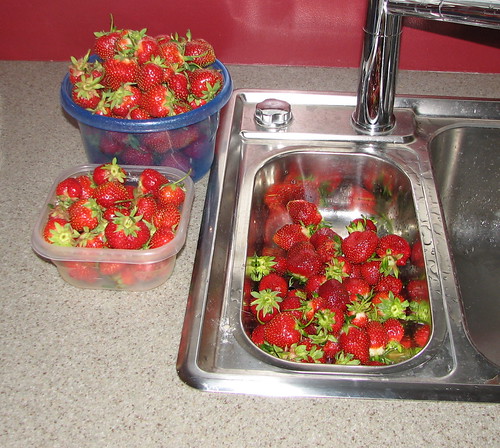
That’s waaay more fruit than you need for one batch. One batch of jam takes about four cups of prepared fruit. (Don’t try to double it; it just doesn’t work well.)
Now for the boring part: you need to wash and destem the fruit. Put some music on and make any available small children, spousal units, etc. help you.
I like my jam pretty smooth so at this point I like to toss the prepared fruit in the food processor and puree it a bit. Then, measure out 4 cups of fruit and put the rest in the fridge or freezer for later.

Now for the actual jam-making part.
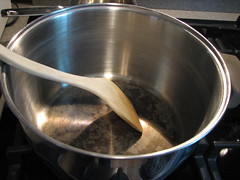
You need a large, flat-bottomed pot and a sturdy implement to stir with. Something with a flat end that will scrape the bottom of the pot is good. You want to keep the jam moving and prevent it from burning to the bottom of the pot.
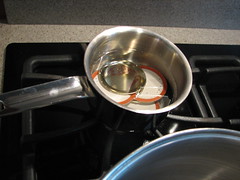
You also need a small pot in which to boil the snap lids. Put 6 or 7 snap lids in this pot and cover them with water.
Before you start the jam itself, fill your sterilizer pot with water, with the insert that keeps the jars off the bottom, and with 6 or 7 jars. Bring it to a good rolling boil before you start cooking the jam. Then, as you’re cooking the jam, boil the jars for ten minutes and leave them in the hot water.
Also before you start cooking the jam, put two small plates or saucers in the freezer. You’ll use these later to check if your jam is done.
When you start cooking the jam, also start heating the snap lids. You want those to boil for about five minutes to soften the rubber stuff around the edge so that it will make a good seal on your jars.
Now you need sugar. Put 3 cups of sugar and 4 cups of your prepared fruit in your big flat-bottomed pan. Don’t skimp on the sugar, it’s important for helping the jam gel properly. Console yourself with the thought that you’re using nice fresh in-season fruit and so your jam will be healthy despite the crapload of sugar. Turn the heat on your stove as high as it can go — the idea here is to bring it to a boil FAST and then boil it FAST. Stir constantly.
After a very few minutes the sugar should melt and everything should be boiling nicely.
At this point, make someone else stir for a minute and cover your arms. You’re probably wearing a short-sleeved shirt since it’s probably summer and you’re in the kitchen with three pots on the stove. But jam splatters in a particularly vicious way, so either put on a long-sleeved shirt or wrap some tea-towels around your arms.
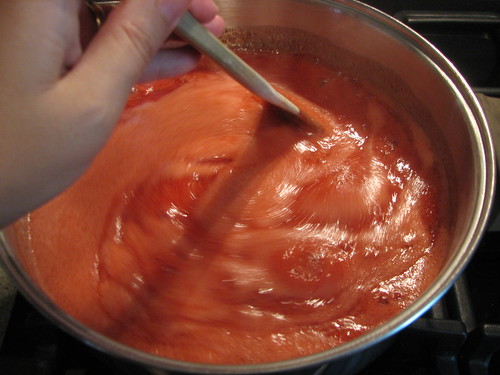
After a while (fifteen or twenty minutes for strawberry, but it depends on the fruit – black currants can be less than ten minutes) the texture and sound of the jam will change. It’ll feel thicker and more lava-like, it’ll start spurting molten globs onto your arms (and everywhere else) and the sound of the bubbles will be louder. It’s kind of a horror-movie boiling-entrails kind of effect here.

When it starts to do this, drip a small amount of jam onto one of the plates you put in the freezer. Put the plate and proto-jam back in the freezer for about a minute, then check to see if the jam has gelled. If not, try again in two minutes (using the other plate) and repeat as necessary. You don’t want to overcook it; it’ll get all stiff and hard to spread.
When the jam gels properly, turn off the heat. Now lift your sterilized jars out of the boiling water and line them up on the counter. I like to put them on a tea towel to catch any drips and help contain the mess.

Pick up the jam pot and using the funnel (if you have one) pour jam into each jar. It’s a nice idea to have someone else move the funnel from jar to jar so you don’t have to put down the jam pot. Leave 1cm airspace at the top of each jar.
Pick hot snap lids out of their own pot (using a magnetic wand or two forks) and put them on the jars.
Hold the snap lids down with the screw tops, but don’t overtighten them. It’s not the screw top that matters here; it’s the snap lid. Just make them finger tight. That’s tricky enough, since jars and lids are really hot at this point!
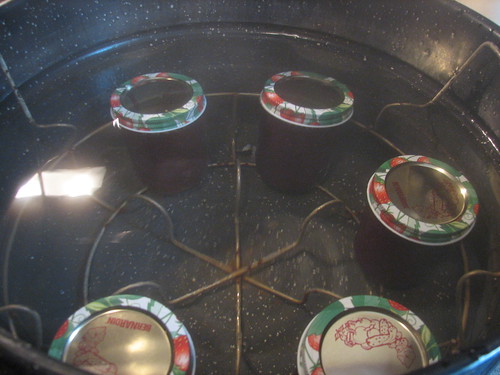
Put the filled jars back in the sterilizer. You’ll see bubbles. Don’t fret, it’s just air expanding within the jars; they’re not filling up with water. Boil the jars for ten minutes or so – this step is actually optional but it’s a good idea as it both ensures a good seal and compensates for any errors in sterility you might have made while filling the jars.
Lift the jars out onto a heat-proof flat surface. Separate them as much as you can so they can cool, but don’t put them anywhere too drafty in case they cool unevenly. Uneven cooling can break the jars.
Now is the moment when you look around and realize that someone’s going to have to clean up a big mess. Toss the jammy dishtowels in the direction of the washing machine, fill the dishwasher with whatever will fit, rinse whatever won’t fit in the dishwasher and leave it in the sink, and be sure to use your finger to get all the yummy remnants off the jam pot and the stirrer.
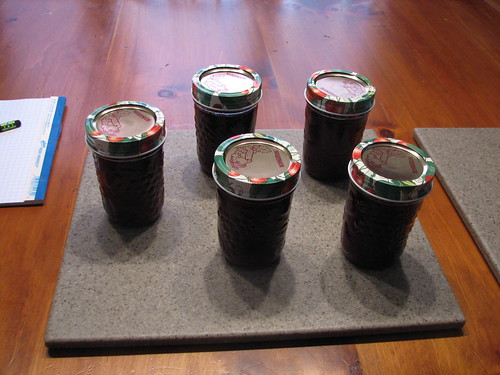
As the jam cools, you should hear loud PING! noises as the snap lids seal the jars. This may take a few hours. When they’re properly sealed, the snap lids should curve slightly downwards. If you push down on the middle of a snap lid and it moves, it’s not properly sealed. After 24 hours, jars that haven’t sealed should go in the fridge and you should eat those ones first. Jars that DID seal can go in the cupboard.
Now you have jam! Even if winter is long and cold you will be happy!
I’ve made jam with my Mom for years … when the kids were small, we’d go pick the fruit and then put them to work stemming the berries. Mom’s made some really awesome jams over the years besides the normal strawberry, etc. We’ve done crab apple/quince, mango/orange, plum, etc. My mother in law also made jams from plum tomatoes, watermelon rinds, orange & grapefruit rinds, chopped quince … she taught me to make those and also the fact that you can make a good jam out of most anything!
Now that I’ve read your post, I think I’ll get back into making my own jams again!!!
Those all sound like great flavours!
A caveat for readers: I skipped all the technical stuff about acid and pectin and whatnot, but if you’re going to experiment it’s good to know about that stuff. Any cookbook with jam recipes in it will go into plenty of detail about this.