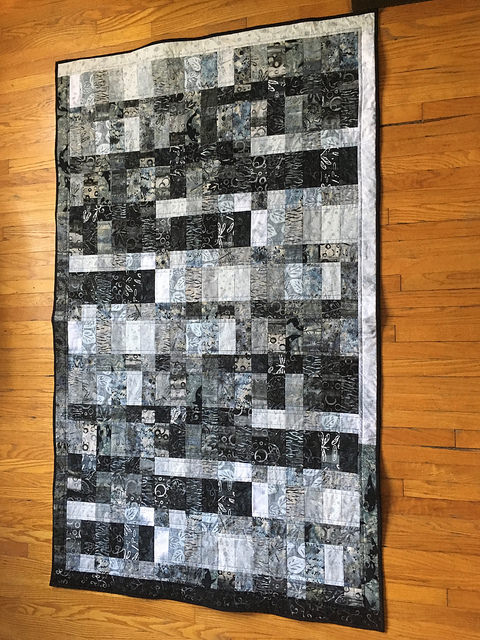
This is a strip-stack quilt top + border + binding I worked out to use up one *entire* jelly roll (forty 2.5″ fabric strips, each about 43-44″ long). Because it uses pretty much every inch of every strip, you really do have to use the wonky center bits of the strips — if you’re a perfectionistic quilter, this is not a design you will enjoy.
All seams are a scant 1/4″ and are sewn right sides together.
There are fifteen 12-inch blocks (finished dimensions) in a 3×5 pattern. Each block has two rows of 4-inch pieces (finished dimensions) alternating with two rows of 2-inch pieces (finished dimensions). With the border and binding, the quilt finishes at about 40″ x 64″.
Making the strip sets
There are five strip sets made from jelly roll fabric strips.
For each of the five strip sets, choose six fabric strips from the jelly roll and arrange them in an order you find pleasing. Stack them up and mark the topmost strip (I use a loose basting stitch in a bright, contrasting thread colour) of each stack.
Number each strip stack with a sticky note or somesuch so you can keep track of which is which for design purposes. I arranged my strip sets from lightest (#1) to darkest (#5) but do whatever works for you.
Sew the long edges of the strips in each stack together, starting by joining the topmost fabric in a stack with the second fabric in that stack. Add the 3rd strip to the bottom of the 2nd and so on until the six fabrics in each stack are all sewn together in one big (probably slightly wonky, because the middles of jelly roll strips are usually a bit wonky) piece about 12.5″ x 43-44″.
Iron each strip set, pressing all seams toward the TOP of each set (this is important) and getting all the lines as straight as you can.
Starch the living heck out of each strip set to keep them from stretching annoyingly while they’re being cut and arranged.
Cutting the strip sets
From each strip set, cut six 4.5″ pieces AND six 2.5″ pieces. There is not much extra fabric so be careful (resign yourself to some eccentricities in the end product).
Arranging and sewing the blocks
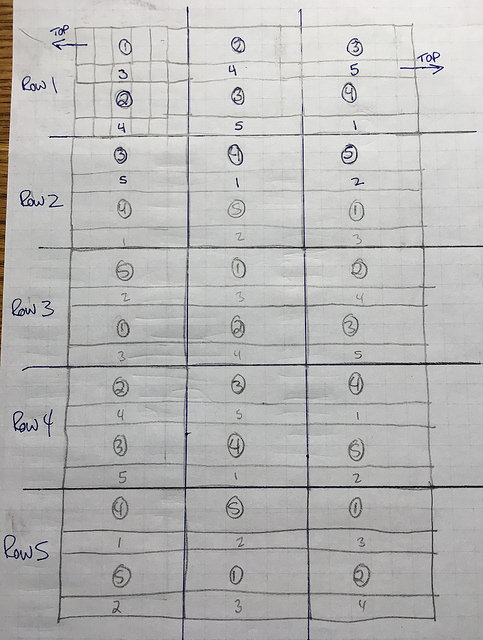
Now is the time to settle on a design. Each block has two 4.5″ strips and two 2.5″ strips, alternating. Here is my design, in which no strip set ever meets itself:

Whatever design you choose, it’s important to orient the 4.5″ and 2.5″ strips in opposite directions. If you decide your 4.5″ strips will have their top fabrics at left in each block, make sure the 2.5″ strips will have their top fabrics at right (or vice versa). That way the seams will nest when you sew them. Then go ahead and sew the bits of each block together.
Trim the sides — only the sides, leave the tops and bottoms untrimmed for now — of each block to make each as close to 12.5″ wide as you can.
Sewing the rows
Sew the blocks in each row together, lining everything up as best you can. Now you can trim the top & bottom so the whole row is 12.5″ (…ish) high (or at least reasonably straight).
Press the seams on the odd-numbered rows OUT towards the edge of the row and the seams on the even-numbered rows IN so they will nest when you sew them together.
Sew the rows together, again lining things up as best you can. Start matching the seams in the middle of each row and work outward to spread any wonkiness more evenly.
Adding borders
Choose five strips from your jelly roll to form the borders. The last one will also end up in your binding, so consider that.
Trim the quilt edges to get rid of any bits that stick out.
Sew the short ends of your chosen fabrics together to form a very long strip. Starting right at one end of this very long strip sew it, right sides together, to the long edge of one side of your quilt top. Trim off the rest of the long strip then sew it to the other long side. Trim that, and sew it to one of the short edges. Trim, then sew it to the last short edge. Keep the remaining piece for the binding. (This is more annoying than using whole strips for the short edges, but leaves the longest possible leftover piece for the binding.) Press your seams to the inside of the quilt.
Making the binding
You will have about 5.5 strips left for binding, which is distressingly not a lot more than what you truly need (I always like to have extra). Cross your fingers and make your binding in the usual way.
The rest
That’s the end of the jelly roll part! Make your quilt sandwich, quilt & bind using your preferred method. The back is narrow enough that you can use a length of normal-width fabric for backing.
My sample
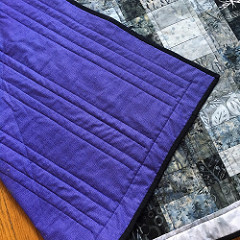
After working out all the calculations, I cheated and subbed three-and-a-half black strips in addition to the two that were in my jelly roll for the binding in place of three-and-a-half patterned strips. Since I was putting a purple print on the back the varied colours in the jelly roll just looked too busy. I’m sure those three-and-a-half displaced strips will end up binding something else eventually.
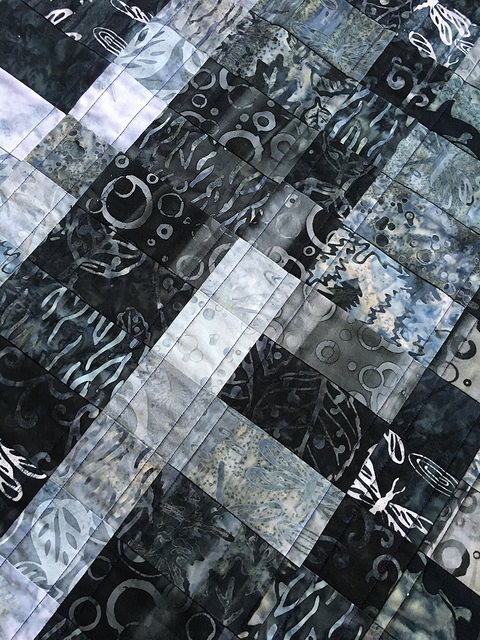
I quilted straight lines on either side of each horizontal seam, then ran a final line around the border at a similar distance from the seam. All the quilting is in dark purple cotton thread.


